Upcycled DIY Birdfeeder
- By hhk
- January 28, 2015
- No Comments
The contrast of the cardinals and blue jays against the powdery snow is stunning. We gazed outside from our warm abode in toasty pajamas taking in the exterior landscape. Beautiful, soft, and quiet except for the purring of snow blowers and the grumbling tummies of our feathered friends. They must be hungry. I’m hungry and I haven’t been scavenging through the barren winter. My little 4 year old Nostradamus, exclaims as if he can hear inside my head, “Mom, I think the birds want breakfast food, or maybe dessert.”
So off we went, gathering a few handy supplies to make our very own bird feeder. The project had to be easy, kid-friendly and not require obscure parts.
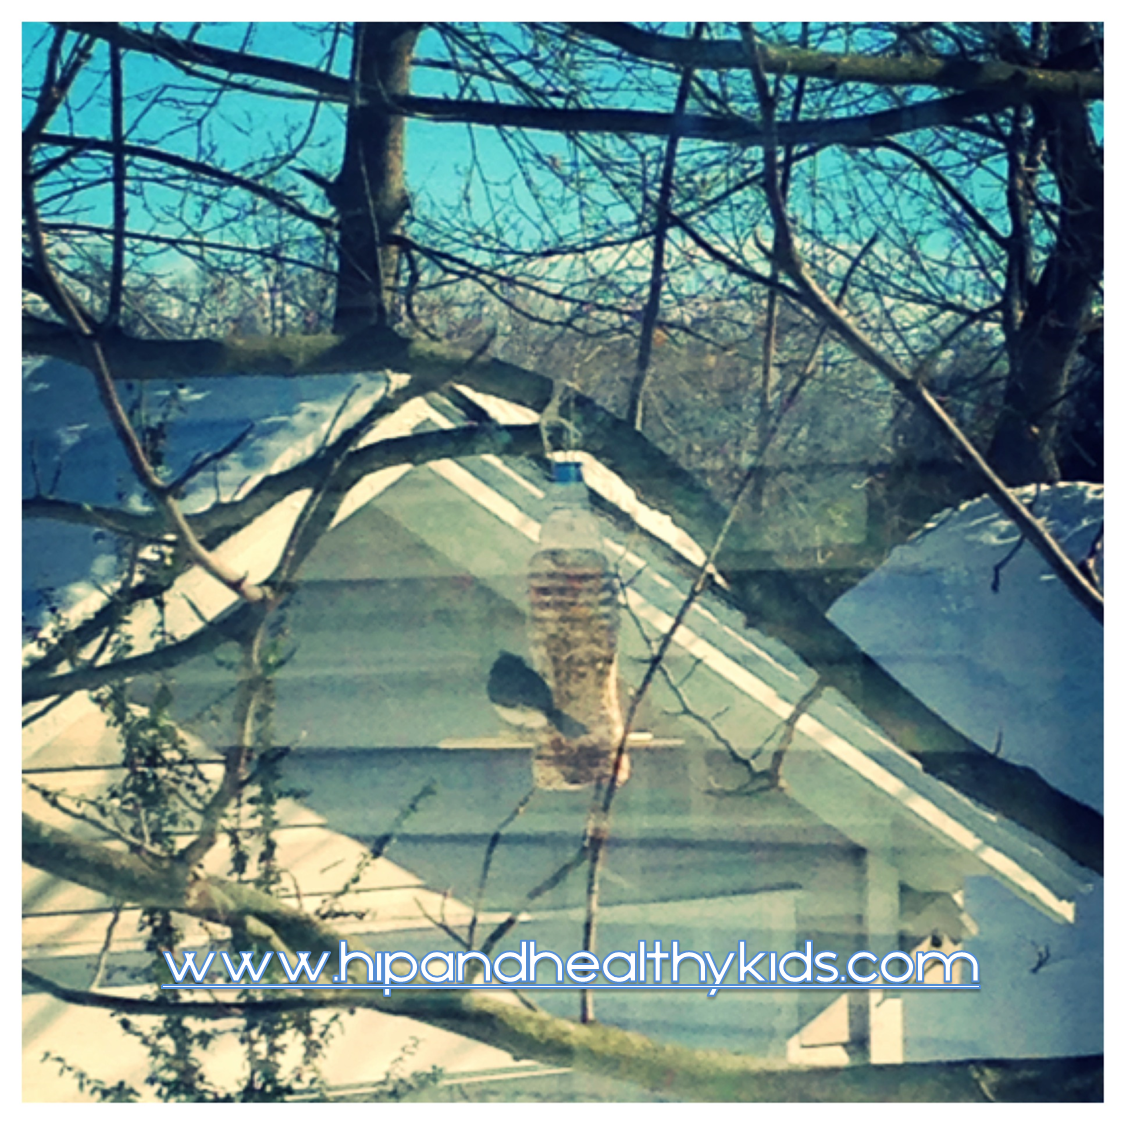
I looked in our recycling container and procured an empty water bottle. I pulled open a kitchen drawer and cursed the 5 million chopsticks that flew out at me. One of those pairs definitely had a future in this feeder.
So we began with the bottle, chopsticks, scissors, twine, a funnel, and birdseed. Our first pass looked cool, but I soon realized the openings for the birds were more like doors and the bottle wouldn’t hold much seed. After a quick internet search I found a simple solution by poking various small holes instead of our 2 doors. Here’s what we did and how you can recreate this fun, pay-it-forward craft for your neighborhood chirps.

Supplies:
- 1 plastic bottle
- 1 pair of chopsticks
- 1 pair of scissors
- Twine cut to desired length
- Funnel
- Bird seed
Steps:
- With the bottle placed upright, use the scissors to create 4 holes near the bottom of the bottle. The chopsticks will crisscross through these holes and form the perch for the birds. Start with one hole, push chopstick straight across then make second hole to push chopstick through. Do the same on an additional side for the other chopstick. You can make chopstick patterns however you’d like, we just tried perches around the same part of the bottle.
- Around 2 inches up from the perch, cut various holes around the bottle. These holes will be where the birds will feed, so make them large enough that your seed can be grabbed through. You can take out a chopstick to push into the feeding holes in order to make sure they are round and not sharp.
- I created 2 holes near the top of the bottle to guide the twine through. (You can also tie the twine around the bottle top, but I thought this maybe too precarious if a big bird or squirrel got ambitious.)
- Now with the chopsticks and twine in place, open the top of the bottle, insert the funnel and begin pouring the seed in until full. This is the most fun step for little hands! My son was waiting patiently as I did the cuts so he could guide the chopsticks and place the seed.
- Put the bottle top back on, go find a branch and tie to the tree tightly.
- Sit back and wait for the show to begin.
This project not only recycled existing materials, but also gave nature a little boost. What could be better! Happy Birdwatching!
Here was our first patron…


Leave a Reply